
What is temaki?
Temaki, also known as hand rolls, are a fun and interactive way to start your sushi making journey. These cone-shaped sushi rolls are made by hand, with a nori sheet laid in the palm of your hand.
They are filled with rice and ingredients before being rolled up into a cone shape. It’s a very forgiving process that allows for endless creativity and experimentation.
Classic temaki combinations often include familiar ingredients such as avocado and salmon or cucumber and tuna. However, the beauty of temaki lies in its versatility. Get creative with fillings like mango, shiso leaves, radish, and whatever seafood you have on hand. The possibilities are endless, and you’re only limited by your imagination when it comes to crafting unique and delicious temaki rolls.
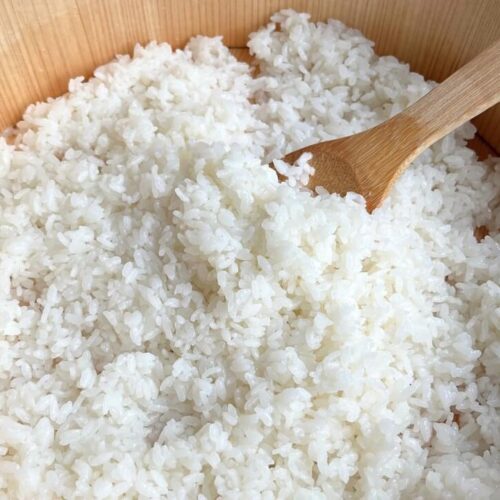
Having good sushi rice is key. You can read my full guide on sushi rice here with tips and techniques, and the recipe is also below.
Party-style temaki
How to make temaki:
Take a piece of nori and fold it in half in first one direction and then back on itself in the other direction. This is to create a crease so you can rip your nori in half.
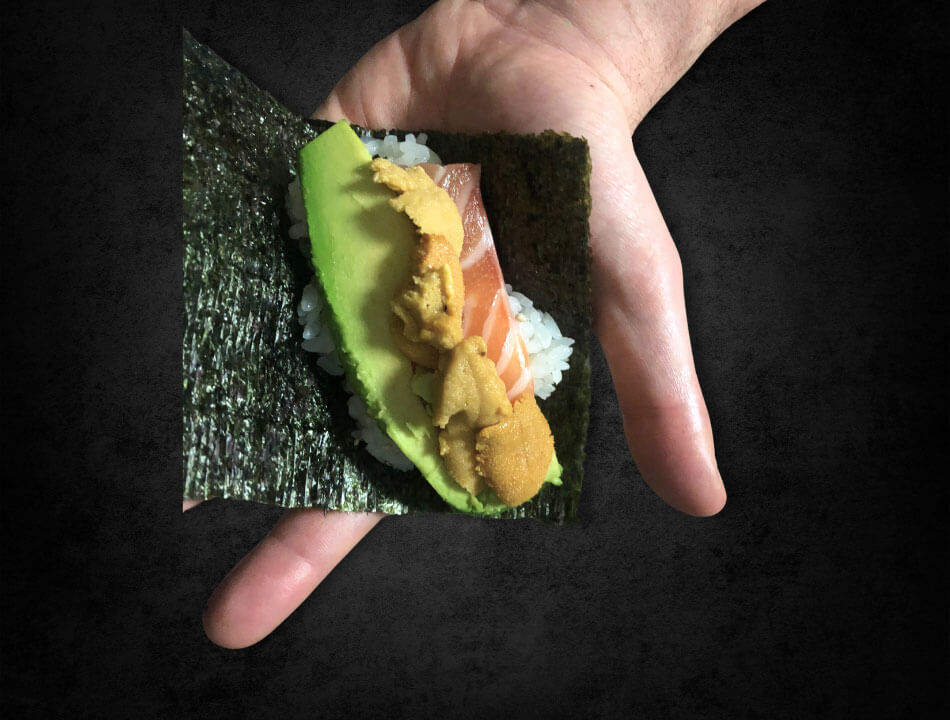
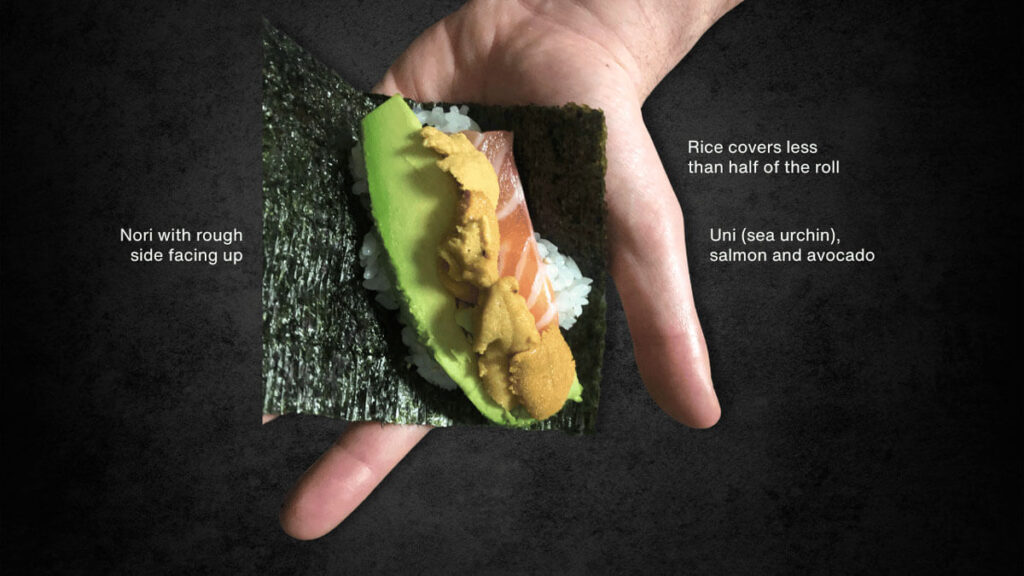
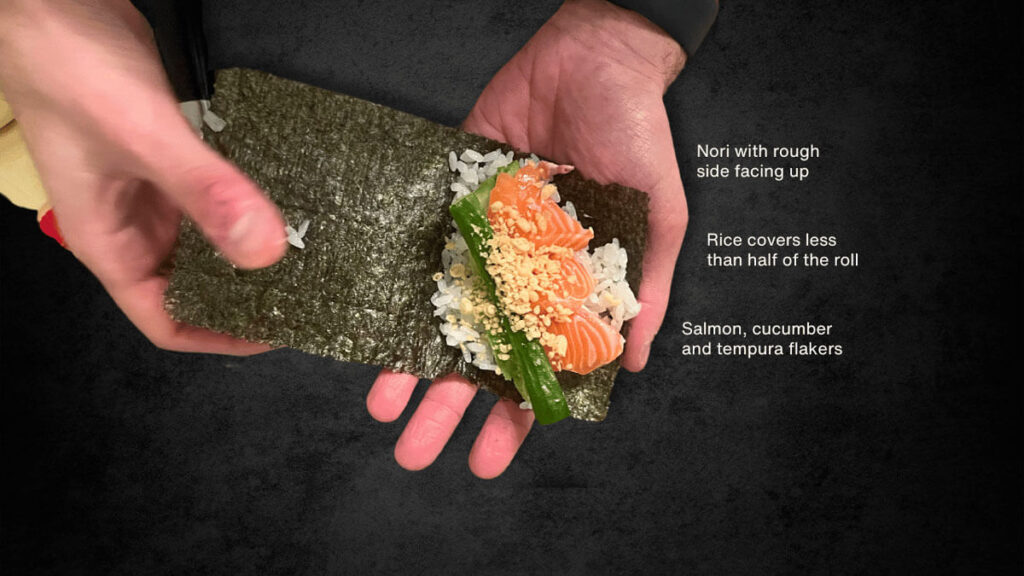
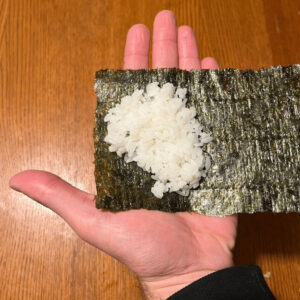
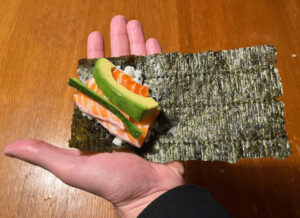
Take one half of your nori, place it rough side up in your palm. Cover less than half of the nori with rice.
Assembly
Add your fillings on top of the rice. Make sure they don’t spill over the rice too much.
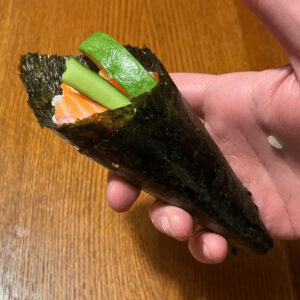
Wrap the nori over the top of the fillings and around the back. Fasten the nori shut with a few grains of rice or wet your fingers slightly and use this to close the nori. We prefer using grains of rice as it usually sticks better.

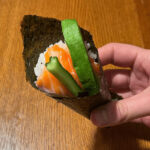
Ta da! Your temaki is ready to eat. Dip dip dip it in soy sauce and enjoy!
Again, you pay a premium for these and I honestly don’t know why. Gobble gobble.
Sushi rice
Materials
Rice seasoning
- 4 tbsp Rice vinegar
- 2 tbsp Sugar
- 1 tsp Salt
Rice
- 2 cups Japanese short grain rice
- 2 cups Water (purified if possible)
- 2 tbsp Sake
- 1 piece Kombu (approximately 10cm x 15cm)
Instructions
Rice seasoning
- Mix all the ingredients together until the sugar and salt are dissolved. Mix it periodically as you wash, cook and steam the rice.
Wash the rice
- Add your rice to a medium saucepan or rice cooker insert and cover it with cold tap water. Swirl the rice around with your hand to release starches. The water will become milky white. Tip the water off, using your hand or a strainer, add more water and repeat the process 4-8 times until the water is pretty clear.
- Add 2 cups of water, preferably filtered, and 2 tbsp of sake (optional). Add a piece of kombu (also optional) and let the rice soak for 30 minutes. You will notice that the rice looks whiter at the end of the 30 minutes.
Cook the rice
Stove top:
- Take out the kombu and put the saucepan on the stove on medium high. Once the water comes to a boil, put the lid on, lower the heat to low and cook for 15 minutes. Do not open or stir the rice during this step.After 15 minutes, take the saucepan off the heat and let it sit with the lid still on for 20 minutes.
- Using a rice paddle or wooden spoon, gently mix your rice. Put the lid back on and let the rice steam for an additional 5 minutes.
Rice cooker
- Take out the kombu and put the insert into your rice cooker. Turn it on and let the rice cook.
- Using a rice paddle or wooden spoon, gently mix your rice. Close your rice cooker and let the rice steam for an additional 5 minutes.
Mix seasoning with rice
- Tip the rice into your hangiri, a large flat bottomed bowl or roasting pan and spread it out. Pour over the rice seasoning and gently stir it through the rice using a slicing gesture. Your aim is to cool down the rice as quickly as possible without breaking up or mashing the grains.
- Stand in front a fan, AC unit or use a hand fan as you stir the rice. This will help it cool down as quickly as possible. Keep mixing until the seasoning is mixed through and the rice looks shiny.
- Wait until the rice is cooled to room temperature before using it. You can cover the hangiri / bowl with a damp towel so it doesn't dry out.
Temaki
Instructions
Arrange ingredients
- Take a piece of nori and fold it in half in first one direction and then back on itself in the other direction. This is to create a crease so you can rip your nori in half.Take one half of your nori, place it shiny side up in your palm. Cover less than half of the nori with rice.
- Add your fillings on top of the rice. Make sure they don't spill over the rice too much.
- Wrap the nori over the top of the fillings and around the back. Fasten the nori shut with a few grains of rice or wet your fingers slightly and use this to close the nori. We prefer using grains of rice as it usually sticks better.
- Ta da! Your temaki is ready to eat. Dip dip dip it in soy sauce and enjoy!
Different types of sushi rolls:
The main types of sushi rolls are:
Hosomaki: – thin rolls (1″ in diameter), nori on the outside, 1 ingredient inside (recipe here)
Chumaki: medium rolls (1-1.5″ in diameter), nori on the outside, 2-3 ingredients inside
Futomaki: thick rolls (2-2.5″ in diameter), nori on the outside, 4-5 ingredients inside (recipe here)
Uramaki: inside-out rolls, nori on the inside with rice on the outside (recipe here)
Temaki: cone-shaped hand rolls